React.js Tutorial Part (Interlude)
March 8, 2015Welcome to part (Interlude) of my React.js/Express.js app tutorial. This is going to be an extension of part 2, where we go into a bit more detail of how to use Gulp along with Bower.io to make our application a better, well-rounded system. We will not be going into too much React.js this tutorial, so I didn’t want to call this “part 3”. If you haven’t already, please start the tutorial at Part 1
Bower
For much of the UI, we are going to use a package manager called Bower. Bower calls itself a package manager for the web, and it actually does a great job at doing just that. We are going to use Bower to install and keep track of many of the third-party libraries we are going to use for our job board.
To install Bower, we simply have to install it from NPM using the following command:
$ npm install --save bower
This automatically adds it to our package.json file which we all should be familiar with now. If you are comfortable with Bower, it is recommended to install the package globally, which I have done. Your mileage may vary.
The one thing I do not enjoy about the default Bower installation is where the libraries are stored by default: .bower-components/. Luckily, it is not that hard to change, so let’s change where we install our third-party libraries. To do this, create a .bowerrc file which looks like the following:
{
  "directory": "public/libraries/"
}
This will change the default bower install folder to be public/libraries/ which will allow us to easily access it later on. Once we do this, let’s create the bower.json file, which will allow us an easy way to save our Bower packages very much like package.json. Simply run the following commands to prompt you to create your bower.json file:
$ bower init
After completing the prompts your bower.json file should look something like this:
{
  "name": "jobs.nodedc.com",
  "version": "0.1.0",
  "homepage": "https://github.com/joshfinnie/jobs.nodedc.com",
  "authors": [
    "Josh Finnie <josh@jfin.us>"
  ],
  "description": "A job board for the NodeDC meetup group.",
  "main": "./bin/www",
  "license": "MIT",
  "private": true,
  "ignore": [
    "**/.*",
    "node_modules",
    "bower_components",
    "public/lib/",
    "test",
    "tests"
  ]
}
Twitter Bootstrap and SASS Setup
The next bit of setup we are going to do for our web app is to install Twitter Bootstrap using its official SASS bower package. You can see what packages are available through bower using its search function: bower search Searching for bootstrap brings up many, many packages, but also shows us the package we want. Here is an excerpt from the search:
$ bower search bootstrap
Search results:

    bootstrap git://github.com/twbs/bootstrap.git
    angular-bootstrap git://github.com/angular-ui/bootstrap-bower.git
    bootstrap-sass-official git://github.com/twbs/bootstrap-sass.git
    sass-bootstrap git://github.com/jlong/sass-bootstrap.git
    bootstrap-datepicker git://github.com/eternicode/bootstrap-datepicker.git
    bootstrap-select git://github.com/silviomoreto/bootstrap-select.git
From here we want to install the bootstrap-sass-official package by running the following command:
$ bower install bootstrap-sass-official --save
Now with the bootstrap-sass-official library installed, we can update our style.scss file to import the Bootstrap packages we want to use. For now, let’s just import the entire bootstrap library. To do this, let’s update our style.scss file to read as the following:
@import "../../libraries/bootstrap-sass-official/assets/stylesheets/bootstrap";

body {
  padding: 50px;
  font: 14px "Lucida Grande", Helvetica, Arial, sans-serif;
}

a {
  color: #00b7ff;
}
Next, let’s set up our Gulp file to automatically build our SASS and add it to our application. To do this, we need to install a few more applications:
$ npm install gulp-sass --save-dev
This will install the gulp-sass so we can have Gulp build our SASS file. We now need to to update our Gulp file with the following function to build our SASS:
var sass = require('gulp-sass');

... // Our existing jsx task is here

gulp.task('sass', function() {
    gulp.src('public/stylesheets/scss/*.scss')
        .pipe(sass())
        .pipe(gulp.dest('public/stylesheets/css'));
})

gulp.task('watch', function() {
    ...
    gulp.watch("public/stylesheets/scss/*.scss", ["sass"]);
})

gulp.task('default', ['js', 'sass', 'watch']);
With the gulp task above, we now have our SASS automatically compiled whenever we change it. Lastly we need to add the compiled CSS to our Jade template. We can do this by simply adding the following line to the head of layout.jade:
link(rel='stylesheet', href='/stylesheets/css/style.css')
Concatenating the Javascripts
With the introduction of Twitter Bootstrap, we have also introduced two new javascript libraries to our code base: the Twitter Bootstrap javascript, and jQuery. Since we are already transforming our JSX code into javascript, let’s take this time to concatenate all our javascripts together into a singular app.js. To do this, we just need to have a way to tell our JSX code that there are more libraries to import. Luckily since we are already using browserify, this is as simple as adding the following lines to our app.jsx file:
var $ = (jQuery = require("../../libraries/jquery/dist/jquery"));
var bootstrap = require("../../libraries/bootstrap-sass-official/assets/javascripts/bootstrap");
Doing this points both jQuery ($) and bootstrap to the appropriate file which were installed via Bower. When we re-run our browserify gulp task, these two libraries get pulled in! Simple as that.
Bootstrapping our App
Now that we have all the plumbing working, let’s add some niceties to our application. We can add the starter Bootstrap template to give it a bit of style. All we need to do is update our layout.jade file to look like this:
doctype html(lang='en')
head
  meta(charset='utf-8')
  meta(http-equiv='X-UA-Compatible', content='IE=edge')
  meta(name='viewport', content='width=device-width, initial-scale=1')
  meta(name='description', content='')
  meta(name='author', content='')
  link(rel='icon', href='../../favicon.ico')
  title= title
  link(rel='stylesheet', href='/stylesheets/css/style.css')
  //if lt IE 9
    script(src='https://oss.maxcdn.com/html5shiv/3.7.2/html5shiv.min.js')
    script(src='https://oss.maxcdn.com/respond/1.4.2/respond.min.js')
body
  nav.navbar.navbar-inverse.navbar-fixed-top
    .container
      .navbar-header
        button.navbar-toggle.collapsed(type='button', data-toggle='collapse', data-target='#navbar', aria-expanded='false', aria-controls='navbar')
          span.sr-only Toggle navigation
          span.icon-bar
          span.icon-bar
          span.icon-bar
        a.navbar-brand(href='#') jobs.nodedc.com
      #navbar.collapse.navbar-collapse
        ul.nav.navbar-nav
          li.active
            a(href='#') Home
          li
            a(href='#about') About
          li
            a(href='#contact') Contact
  .container
    .starter-template
      p
        block content
  script(src='/javascripts/build/app.js')
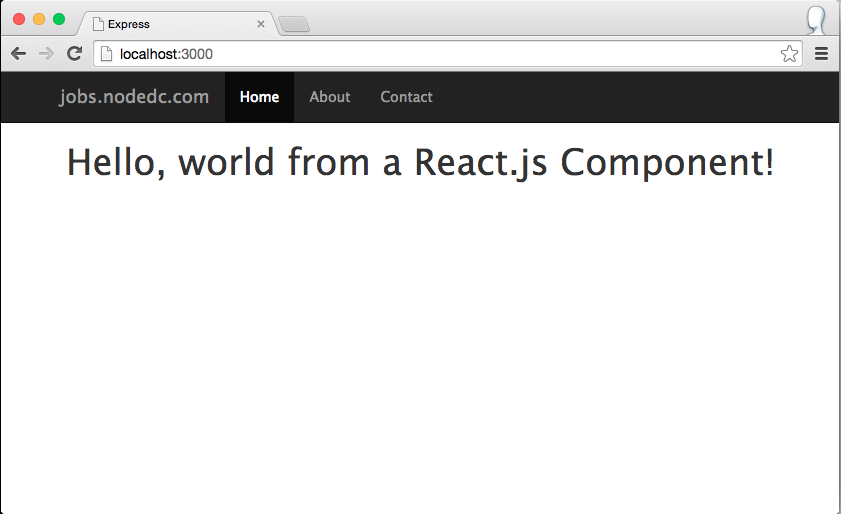
This then makes our web application this: