
Welcome to part 3 of my React.js/Express.js app tutorial. In this part we are going to actually take a deep dive into react and start hashing out the application’s components. If you haven’t already, please start the tutorial at Part 1
A React Component
From the React Documentation, “React is all about building reusable components. In fact, with React the only thing you do is build components. Since they’re so encapsulated, components make code reuse, testing, and separation of concerns easy.” This is what drew me to React in the first place, coming from Angular.js the idea of components spoke to me. It seemed like React’s components were the next logical step in the progression of Javascript’s MVCs. Here we are going to try our hardest to stay true to the definition of a React Component and try to truly encapsulate a single idea of our web application per React component. First, let’s see what this means in regards to our job board web application.
The Job Component
This first encapsulated part of our web application is going to be the job posting itself. Here we want to create a component that simply lists the information that we should have in an individual job post. To start, lets create a file for this react component and let’s call it Job.jsx and put it in our public/javascripts/scr/ folder:
var React = require("react");

module.exports = React.createClass({
  render: function () {
    return <h1>Job Title</h1>;
  },
});
This file might look surprisingly similar to our HelloWorld.jsx file and that is because it is! Of course we want to add some functionality to our Job component, but first let’s get it hooked up into our application. To do this, we will need to modify our app.jsx file slightly to use the Job component instead of the HelloWorld component. To do this, modify the app.jsx file to read as the following:
var $ = (jQuery = require("../../libraries/jquery/dist/jquery"));
var bootstrap = require("../../libraries/bootstrap-sass-official/assets/javascripts/bootstrap");
var React = require("react");
var HelloWorld = require("./Job.jsx");

React.render(<HelloWorld />, document.getElementById("job-post"));
Please note we also changed the HTML element we are attaching our React app to from example to job-post so make sure to adjust your index.jade file to match. Running gulp and then serving your application, you should see a header title of “Job Title” instead of our “Hello World” text from the last couple of tutorials. Now let’s add some information to this component and really make it look like a job posting!
Adding Information to our Component
To add some useful information to our Job component, we want to create an “initial state” for the component. This over simplifies the task of getting data into your component, but it will work for us right now. In the Job.jsx file, we want to create a function called getInitialState and return a dictionary with the information we want our component to start with. Once we do that, we want to change our rendering element to use the initialized state. Below you will see what changes we made to Job.jsx to accomplish this:
var React = require("react");
module.exports = React.createClass({
getInitialState: function () {
return {
company: "TrackMaven",
position: "Software Maven",
local: "Washington, DC, USA",
lookingFor: "Angular.js, Django, ElasticSearch",
postedDate: "4 April 2015",
description: "",
category: "Engineer",
};
},
render: function () {
return (
<div>
<h2 class="listing-company">
<span class="listing-company-name">{this.state.company}</span>
<span class="listing-location">{this.state.local}</span>
</h2>
<span class="listing-job-type">Looking for: {this.state.lookingFor}</span>
<span class="listing-posted">Posted: {this.state.postedDate}</span>
<span class="listing-company-category">{this.state.category}</span>
</div>
);
},
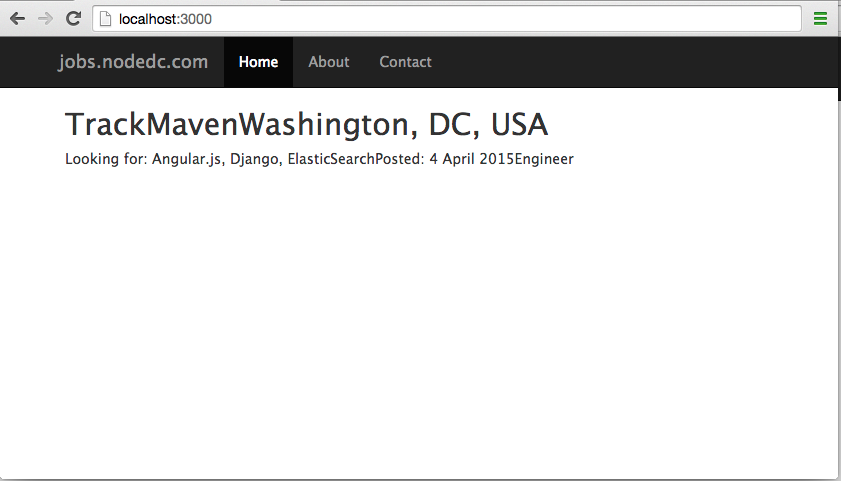
});Note that with the getInitialState function, the render function now has access to a useful state. We can cycle through the state to render the data in our app. Our web application should now look like this:
Adding More Components (Components within Components)
Having a job posting is great and all, but we are not doing all this work to just post a single job. We need a way to iterate through a list of jobs and render many Job components. This isn’t as hard as it sounds, we first need to create another component, though. Let’s call this component Jobs since it’s going to create many Job components. To keep our codebase as clean as possible, we are going to create another file to hold our Jobs component; we are going to call it Jobs.jsx.
In the Jobs component, we are going to map all the jobs to individual Job components, but for this part of the tutorial, we are still going to hard-code the data. First, we want to create an “initial state” that is going to mirror our future API call. This is done through the getInitialState function in our Jobs component. Looping over this data to render many components is easy in React.js, but not all that intuitive. We want to use the map() function in Javascript to map each “job” to the Job component. Below is what the final Jobs.jsx file looks like:
var React = require("react");
var Job = require("./Job.jsx");

module.exports = React.createClass({
  getInitialState: function () {
    // This will be an API call eventually...
    return {
      data: [
        {
          company: "TrackMaven",
          position: "Software Maven",
          local: "Washington, DC, USA",
          lookingFor: "Angular.js, Django, ElasticSearch",
          postedDate: "4 April 2015",
          description: "",
          category: "Engineering",
        },
        {
          company: "TrackMaven",
          position: "Junior Software Maven",
          local: "Washington, DC, USA",
          lookingFor: "Javascript, Python",
          postedDate: "4 April 2015",
          description: "",
          category: "Engineering",
        },
      ],
    };
  },
  render: function () {
    return (
      <div className="list-group">
        {this.state.data.map(function (job) {
          return (
            <Job
              company={job.company}
              position={job.position}
              local={job.local}
              lookingFor={job.lookingFor}
              postedDate={job.postedDate}
              description={job.description}
              category={job.category}
            />
          );
        })}
      </div>
    );
  },
});
This allows us to clean up the Job component a little bit, most importantly switching from using state to props since we are now passing in the data to the Job component and not using our getInitialState function. Most of this is the same, but we made some small changes to the return function. First note the change from class to className due to some issue with React.js and how it handles the class namespace. Second, note we got rid of the getInitialState function since we now pass in the data through our Jobs component.
var React = require("react");

module.exports = React.createClass({
  render: function () {
    return (
      <a href="#" className="list-group-item">
        <h4 class="list-group-item-heading listing-company">
          <span className="listing-position-name">{this.props.position}</span>
          <small className="listing-company-name">{this.props.company}</small>
          <small className="listing-location">{this.props.local}</small>
        </h4>
        <p className="list-group-item-text">
          <span className="listing-job-type">Looking for: {this.props.lookingFor}</span>
        </p>
        <p className="list-group-item-text">
          <span className="listing-posted">Posted: {this.props.postedDate}</span>
          <span className="listing-company-category">{this.props.category}</span>
        </p>
      </a>
    );
  },
});
Next let’s add some simple SCSS in our public/stylesheets/scss/style.scss file to make our application look a little better. Below is all the SCSS I have added:
@import "../../libraries/bootstrap-sass-official/assets/stylesheets/bootstrap";
body {
padding: 50px;
font: 14px "Lucida Grande", Helvetica, Arial, sans-serif;
}
a {
color: #00B7FF;
}
#jobs {
padding-top: 10px;
}
.listing-location {
float: right;
}
.listing-company-name {
margin-left: 10px;
}
.listing-company-category {
float: right;
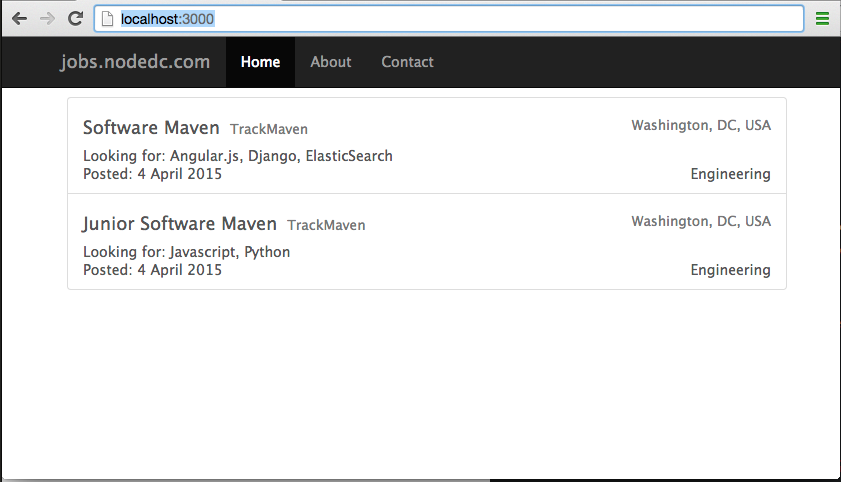
}And now looking at it all put together, we now have something that looks like this!
Conclusion
In this tutorial we went through how to create a real component and how to loop over that component with data. Our application is looking more and more like a real web app! Next time we will work through how we are going to build out our Express.js app to return some JSON jobs data and how we can make our React.js app talk to that API. See you then!